.png)


Medical Insurance Verification User Guide: How to Verify Medical Insurance on Salesforce
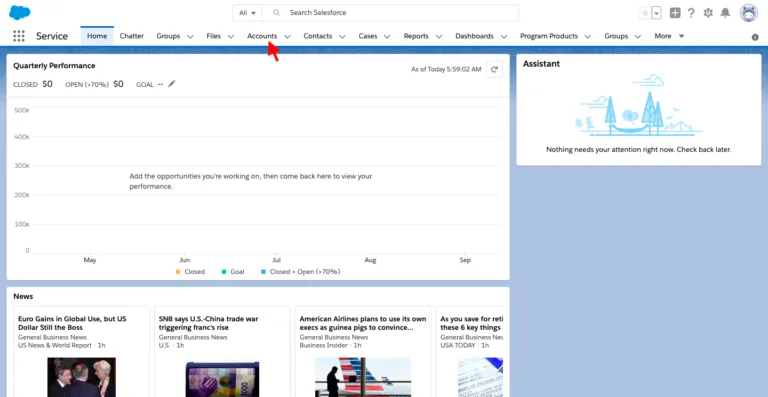
- Log in to your Salesforce Org.
- Click on the Account Tab.
3. Create a new record or go to existing record
4. Click on Lightning Action Button Verify Medical Insurance.
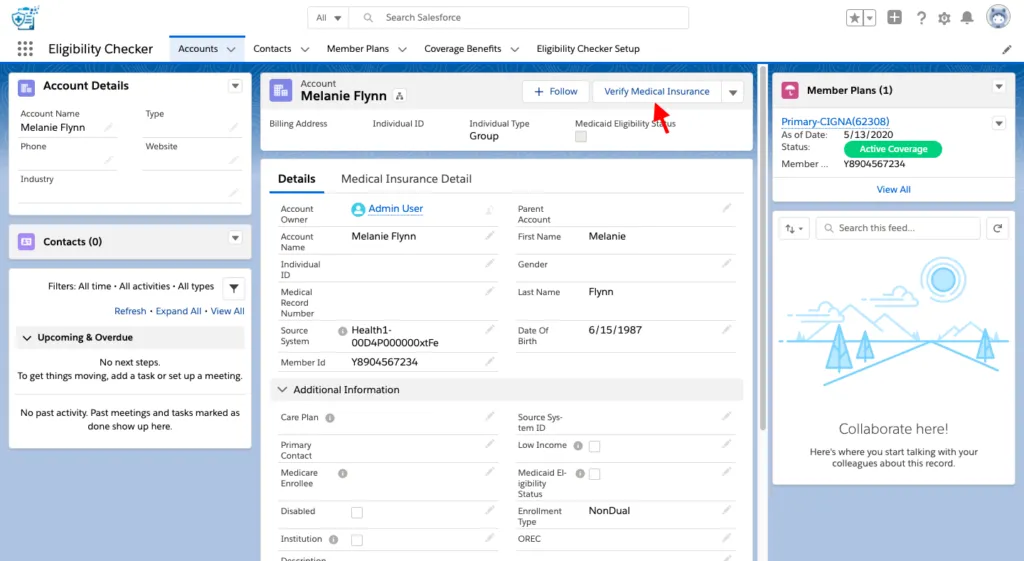
6. You can see all the Fields are populated Automatically from Account.
7. Select Payer Name from the Search bar.
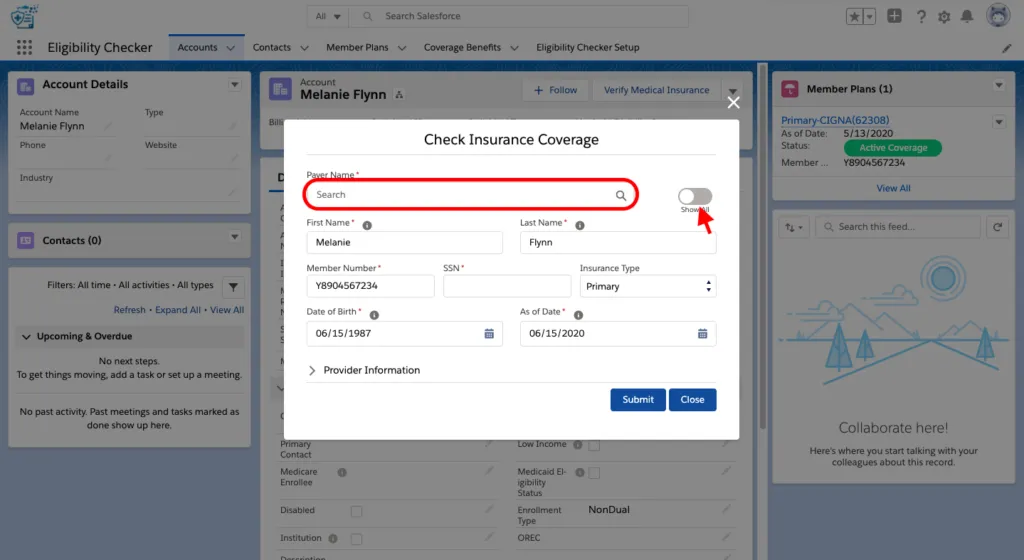
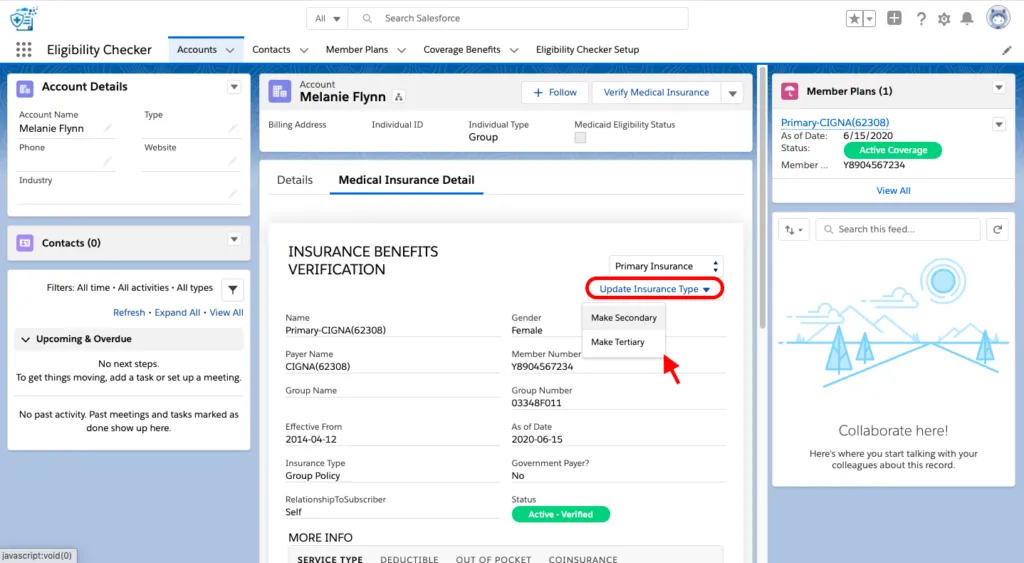
8. From the Drop down shown in the Figure Select the Insurance type whether it is Primary, Secondary or Tertiary.
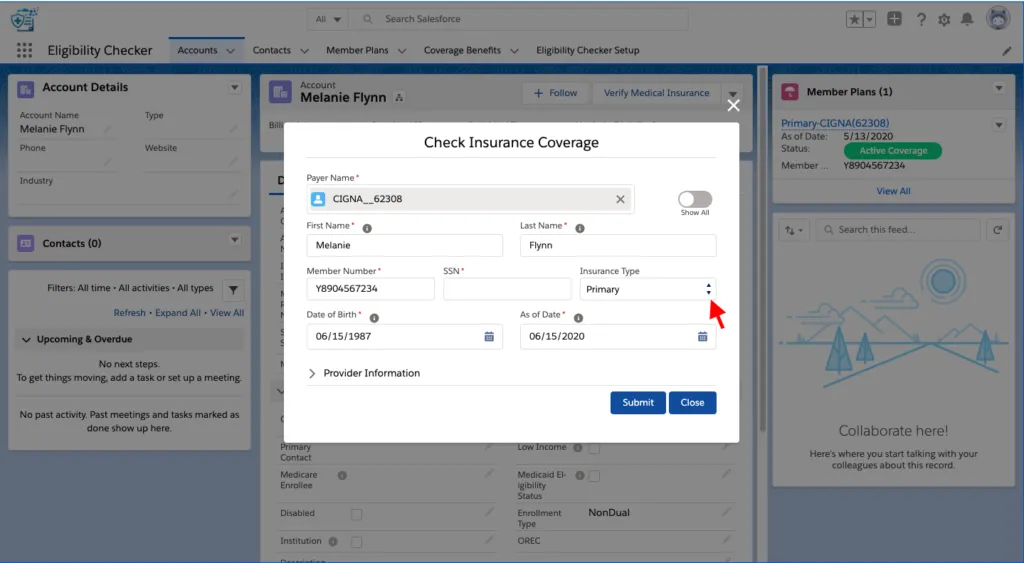
10. Click Submit.
Congratulations! You have successfully Verified Eligibility of the Applicant.
Let’s Verify all the Data.
11. Click on the Medical Insurance Detail Tab on the Record.
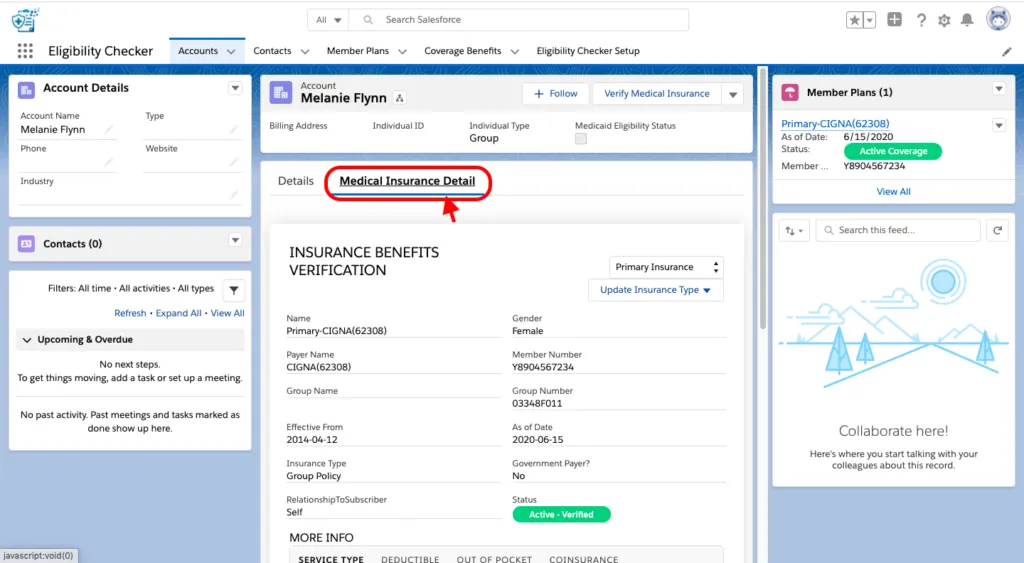
Scroll down in Insurance Benefit Detail tab and you will be able to see all the related sections like –
- Deductibles.
- Out of Pocket.
- Co-Insurance.
- Service Type.
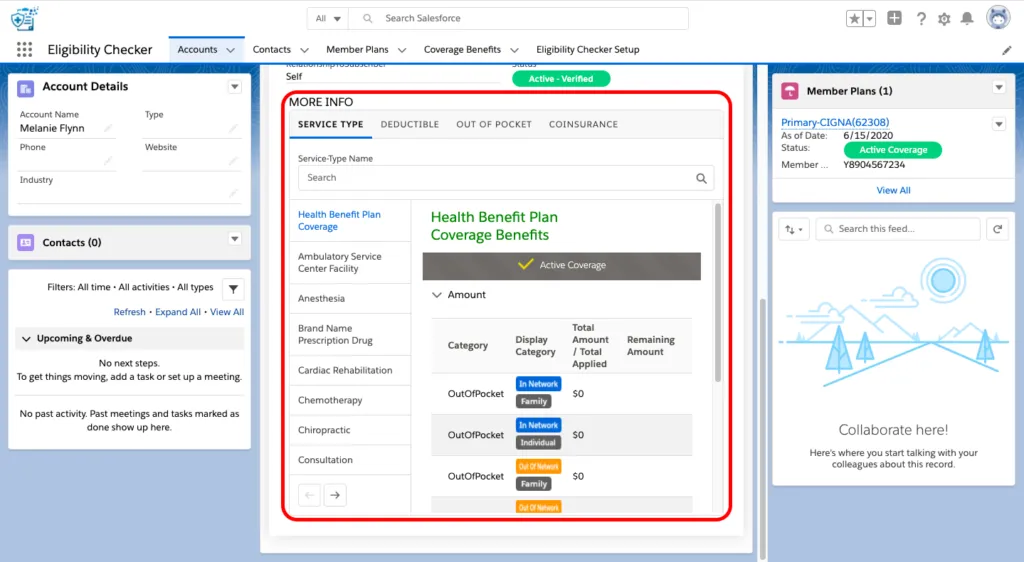
For more information of the service type click on the service type tab.
- Click on the service type on which you want information.
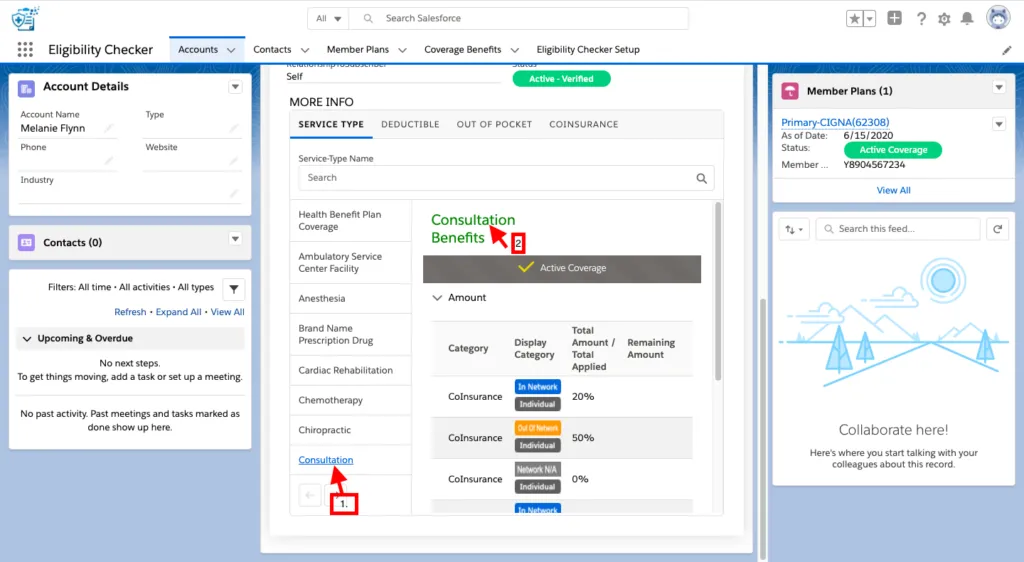
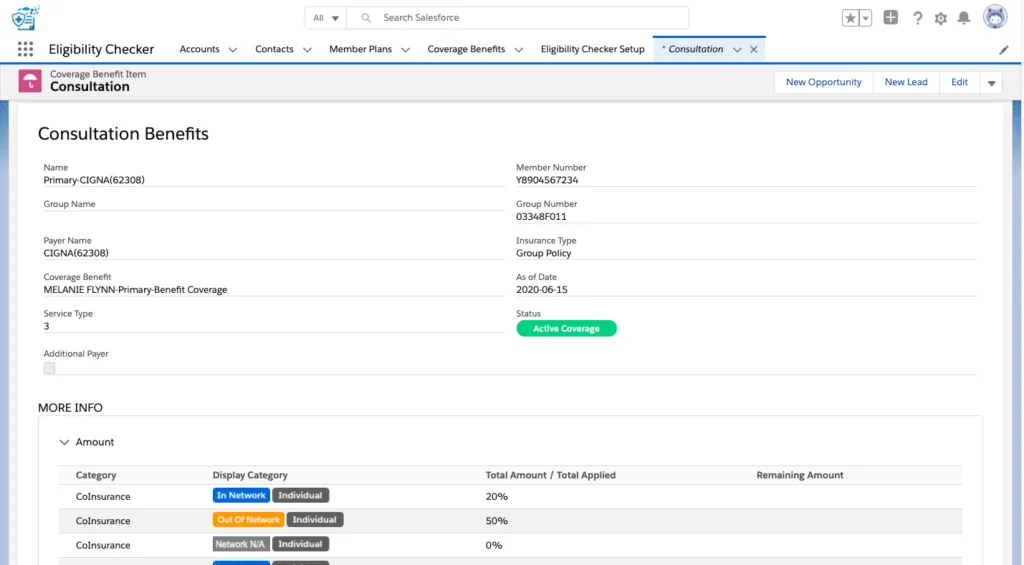
11. You will be directed to Coverage Benefit Item Detail of the Record.
Note : You can also change the Insurance type from Primary to Secondary/Tertiary based upon your requirements.
- Click on the Update Insurance Type and Select one of the options.
Thanks for Choosing Cloud Maven, Inc. as your trusted partner. For any queries or concerns please feel free to write to us at support@cloudmaveninc.com .